Screen Mirroring and Meeting Technology
1. Point the remote at the lower left corner of the display. Press the Source button on the remote controller.

2. Using the arrow buttons on the remote controller, select HDMI 1 as the source.

3. Connect your Apple device to the same wifi network you see on the TV prompt.

4. Proceed with the screen mirroring feature of your apple device and choose the TV cart you see on the TV screen prompt.

1. Point the remote at the lower left corner of the display. Press the Source button on the remote controller.

2. Using the arrow buttons on the remote controller, select HDMI 2 as the source.

3. Press the Windows and K keys on your laptop.

4. On your windows laptop, select the TV cart you see on the TV screen prompt.

How to set up the Meeting Owl for the first time
USAGE INSTRUCTIONS
- Turn on the AV system via the touch panel and select Computer.
- Login to the Mac with your Pratt OneKey.
- Launch and sign in to your Zoom via SSO.
- Start your meeting.
- Select the Meeting Owl as your Camera, Microphone, and Speaker.
Camera Specifications
- Single custom-designed 360°panoramic fisheye camera to eliminate image distortion
- Camera view shows optional 360° panoramic view of the room and face-to-face view that auto-focuses on whoever is speaking
- Output Resolution: 1080p HD
- Field of View: 360°
Microphone Specifications
- 8 omni-directional beamforming Smart Mics
- Smart Mics equalize speaker volume to amplify quiet voices
- Audio Pickup Radius: 18 feet (5.5m)
- Ability to pair two Meeting Owl Pros with Owl Connect to expand video and audio range by 8’ (2.5m) in any direction
Speaker Specifications
- Three built-in speakers for 360° coverage and clear in-room sound
- Speaker Output Level: 76 db SPL
Conference Rooms
Getting Started
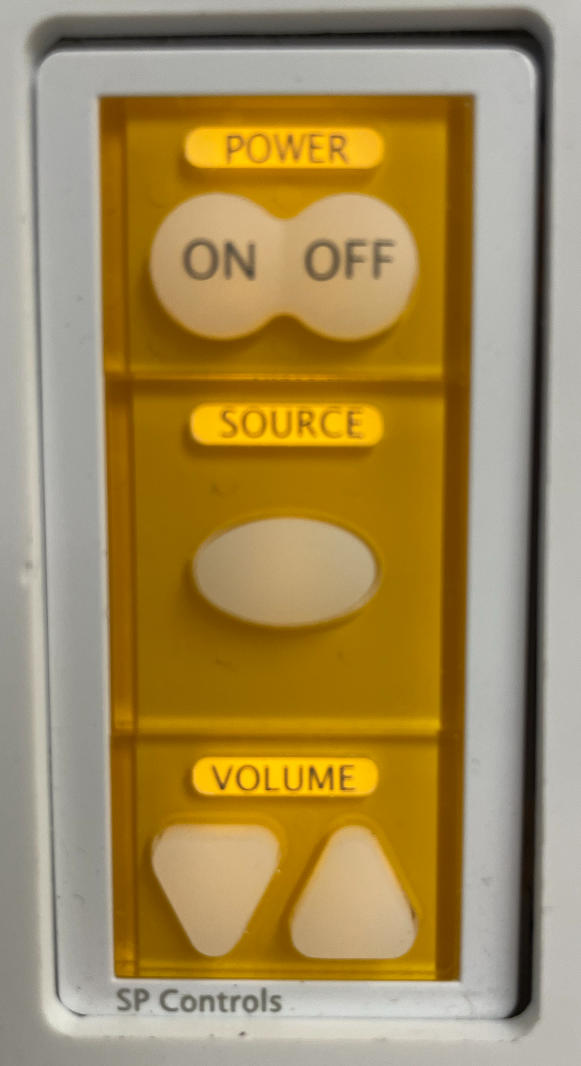
- Press Power on the wall controller once. Wait 15-30 seconds for it to warm up. Press the off button twice to turn off.
- Press the ‘Source’ button on the projector controller to toggle between available inputs in order they are received: HDMI 1 (Apple TV) and HDMI 2 (Windows Wireless). Each button press will advance to the next available input, but will default to Apple TV upon start up.
- For Apple TV or Windows Wireless, follow the instructions shown on the projected image, or read below.

Connecting a Mac to the Apple TV
- Connect your device to the ResearchYard Wifi network.
- Go to System Preferences > Bluetooth and make sure it is enabled.
- Go to System Preferences > Displays > Click ‘Add Display’ > Select the ‘Conference Room South’ Apple TV from the drop down menu.
- Enter the passcode show on the projected image on your device. Your screen will now appear as the projected image. Only one device can be connected at a time.
- To toggle between a mirrored or extended display mode, press the keys Command + F1 simultaneously.
- To change audio output settings, go to System Preferences > Sound > Output and choose “Conference Room South Airplay” as the output, which will route sound to the projector amplifier. If you have an external USB or Bluetooth speaker, or prefer your built-in speakers, you will need to manually select that as the audio output device.
Connecting an iOS Device to the Apple TV
- Connect to the ResearchYard Wifi network.
- Go to System Preferences > Bluetooth and make sure it is enabled.
- Open Control Center.
- For iPhone X or later: Slide down from the Top right corner of your screen.
- For iPhone 8 or earlier: Slide up from the bottom of your Screen.
- Tap the Screen Mirroring icon.
- Select the ‘Conference Room South’ Apple TV.
- Enter the passcode that appears on the projector screen. Only one device can be connected at a time.
- Your iOS device should now appear on the screen.
Connecting to the Microsoft Wireless Display Adapter
- Connect to the ResearchYard Wifi network.
- Click the Windows+K keys simultaneously to open display settings.
- Click Connect to a Wireless Display. A sidebar will appear on the right side of the screen; click on the ‘Conference Room South’ wireless display.
- Duplicate or Extend Your Display. Windows uses the term ‘duplicate’ screen instead of mirror (like Apple). Go to Display Settings and choose Multiple Displays. Choose Duplicate or Extend.
- Audio & Video Playback Settings. If sound plays on your device when you’re streaming video to a connected display, you can configure the sound source manually. Here’s how:
- Select Search on the taskbar, enter Sound, then select Sound Settings from the list of results.
- Choose where to play sound: select the name of your speakers on your PC, an external speaker, or Microsoft Wireless Display Adapter. If the Microsoft Wireless Display adapter is selected, sound will be output from the projector amplifier.

Getting Started
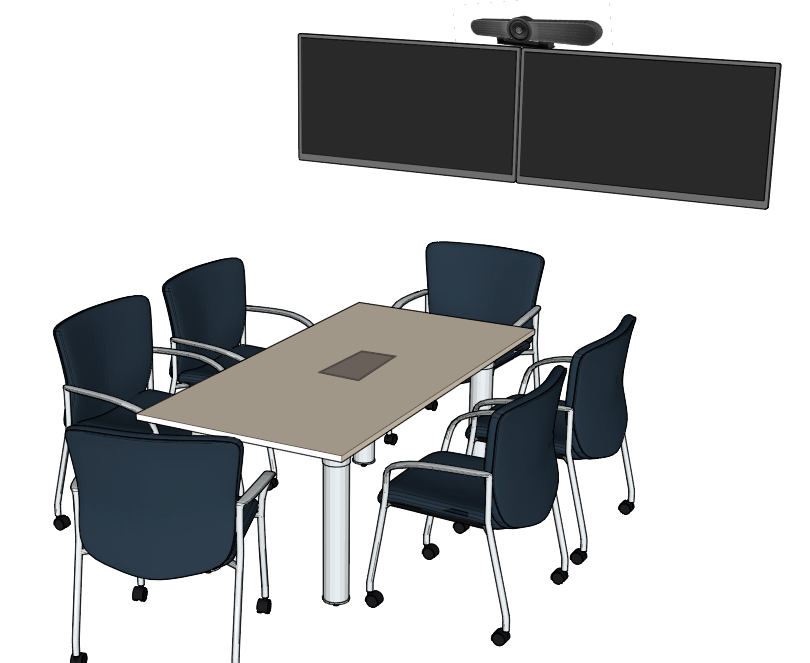
- Turn on both displays by pressing the local power buttons or use the remote control mounted underneath the table (button 1 in the diagram).
- Set both TVs to input source HDMI 1 using the source button (button 2 in the diagram).


- Locate the touch panel on the table. Tap New Meeting to start a new one or Join for an existing invite. If you click Join, enter the Meeting ID in the prompt, and connect to Zoom.

- Press ‘Share Content’ to share your display.
- There are two options:
- Physical HDMI cable (with adapter if needed).
- Wirelessly (type in the code shown on the panel or display).


- Once the Zoom meeting is in session, you will see your self-view as well as the other participants. You can turn on gallery mode or active speaker view depending on your preferences. Your computer’s desktop or window you choose to share will appear on the other screen and be viewable to remote participants.


- The Logitech Meetup (Camera/ Microphone/ Speaker) can be controlled via the touch panel or the square Logitech button remote on the table.
- Microphone Mute
- Call answer
- Call end
- Bluetooth pairing
- Volume up/down
- Zoom in/out
- Camera pan/tilt
- Camera home
- Camera preset

* Please note that not all applications support call answer and end buttons.
ZOOM SETTINGS
- From zoom settings or the camera, speaker, and microphone to “Logitech Meetup” (sometimes visible as “Echo Cancelling Microphone”)
Getting Started
- Press the power on button on the wall controller once. Wait 15-30 seconds for it to warm up. Press off twice to power off.
- Press the ‘Source’ button on the projector controller to toggle between available inputs in order they are received:
-
- HDMI 1 (Apple TV)
- HDMI 2 (Windows Wireless).
-
Each button press will advance to the next available input, but will default to Apple TV upon start up.
- For Apple TV or Windows Wireless, follow the instructions shown on the projected image, or read below.
- Please Note: the direct HDMI connection on the wall is currently inactive and only wireless connectivity is possible.

Connecting a Mac to the Apple TV
- Connect to the ResearchYard Wifi network.
- Go to System Preferences > Bluetooth and make sure it is enabled.
- Go to System Preferences > Displays > Click ‘Add Display’ > Select the ‘Pratt Center’ Apple TV from the drop down menu.
- Enter the passcode show on the projected image on your device. Your screen will now appear as the projected image. Only one device can be connected at a time.
- To toggle between a mirrored or extended display mode, press the keys Command + F1 simultaneously.
- To change audio output settings, go to System Preferences > Sound > Output and choose “Pratt Center Airplay” as the output, which will route sound to the projector amplifier. If you have an external USB or Bluetooth speaker, or prefer your internal speakers, you will need to manually select that as the output device.
Connecting an iOS Device to the Apple TV
- Connect to the ResearchYard Wifi network.
- Go to System Preferences > Bluetooth and make sure it is enabled.
- Open Control Center.
- For iPhone X or later: Slide down from the Top right corner of your screen.
- For iPhone 8 or earlier: Slide up from the bottom of your Screen.
- Tap the Screen Mirroring icon.
- Select the ‘Pratt Center’ Apple TV.
- Enter the passcode that appears on the projector screen. Only one device can be connected at a time.
- Your iOS device should now appear on the screen.
Connecting to the Microsoft Wireless Display Adapter
- Connect to the ResearchYard Wifi network.
- Click the Windows+K keys simultaneously to open display settings.
- Click Connect to a Wireless Display. A sidebar will appear on the right side of the screen; click on the ‘Pratt-Center’ wireless display.
- Enter the passcode shown on the projector screen on your device if prompted.
- Duplicate or Extend Your Display. Windows uses the term ‘duplicate’ screen instead of mirror (like Apple). Go to Display Settings and choose Multiple Displays. Choose Duplicate or Extend.
- Audio & Video Playback Settings. If sound plays on your device when you’re streaming video to a connected display, you can configure the sound source manually. Here’s how:
- Select Search on the taskbar, enter sound, then select Sound settings from the list of results.
- For Choose where to play sound, select the name of your speakers on your PC, an external speaker, or Microsoft Wireless Display Adapter. If the Microsoft Wireless Display adapter is selected, sound will be output from the projector amplifier.